Instructions to Setting up Tamil Typing Software
After download and installation of Tamil Typing software, we need to setup Tamil keyboard in order to use it for Tamil typing. Setup process for Tamil Keyboard is quite straight forward for Windows 7, typically takes 1-2 minutes in complete process and your system will become bilingual. Here are we given step by step process of Setting up Tamil Indic software with screenshots.
Click Here for Setup Tamil Indic Software and Keyboards in Windows 10 and Windows 8
Setup Tamil Typing Software in Windows 7 and XP
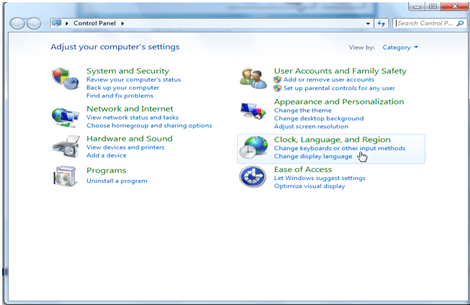
Step 1: Go to Control Panel
Step 2: Click on Change keyboard or Other Input Methods
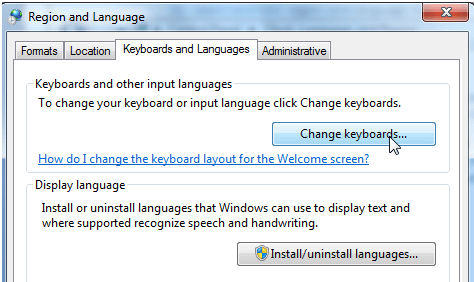
Step 3: Click on Change Keyboard Option
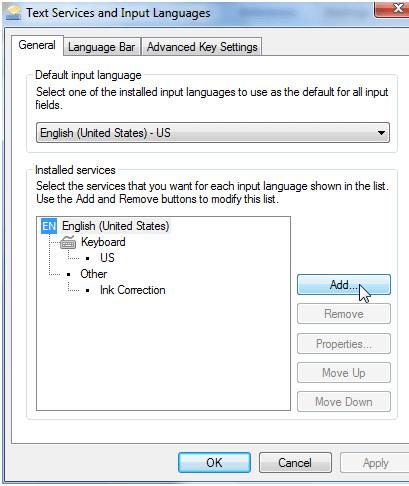
Step 4: Click on Add Button at Text Services and Input Languages window
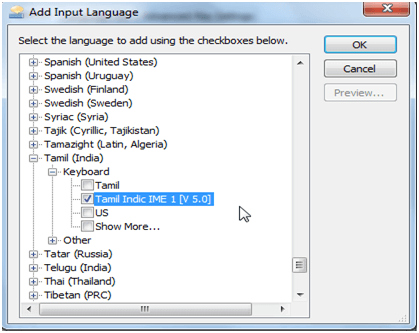
Step 5: Now Search for Tamil Language in the Add Input Language window where you will find so many languages. Select Tamil Indic Input IME 1 [V 5.0] (Your version may be different based upon your OS). and click on OK Button. then apply and ok.
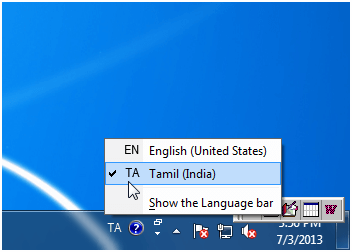
Step 6: Now Click on EN button at taskbar at the bottom of your desktop. It is the language Bar. Select Tamil India Option in Language Bar. You can also use shortcut key Alt+Shift to switch between the languages.
Language Bar Now Showing ? Click here to Enable Language bar in Windows
Step 7: After Selecting Tamil you will find a little window appear like this on the corner at date and time display.
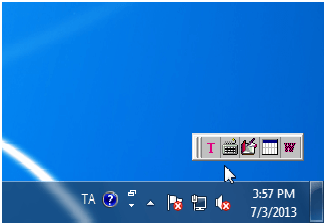
Step 8: Now click on keyboard option you will find many Tamil keyboard options, Select one of your choice and Type in Tamil. You can also see the Tamil keyboard layout in keyboard option.